Today, WordPress is one of the most popular and widespread content management systems in the world. Based on this convenient and simple engine, many blogs, sites, and portals are built. But such simplicity and prevalence attract the attention of not only honest users but also attackers. Any student can create a site now, but in order to protect it competently, it will require knowledge and at least a little experience.
That is why the security and safety of WordPress is one of the most important aspects of working on your website. Protecting WordPress from hacking includes many ways that it is important to apply to everyone who does not want their site to be hurt.
Today we will look at a number of simple, but at the same time, very important ways to protect your WordPress site.
1. Use a good username
Securing a WordPress site begins with the basic elements of creating a good login. When installing WordPress, users often use the login that the installer offers by default, namely admin. This is what bots look for holes in the security of your site in the first place. Using this login, you already provide half of the necessary information for hackers, and they can only pick up the password.
If you have already installed the platform and are working on your site, then you are unlikely to want to remove the installation and start from scratch in order to use a more reliable login. There is an exit:
Step 1 – Create a New User
Log in to the WordPress admin panel and create a new account with a more complex login, endowed with full access to all functions of the site, that is, administrator rights.
In the main menu on the left, select Users >> Add New.
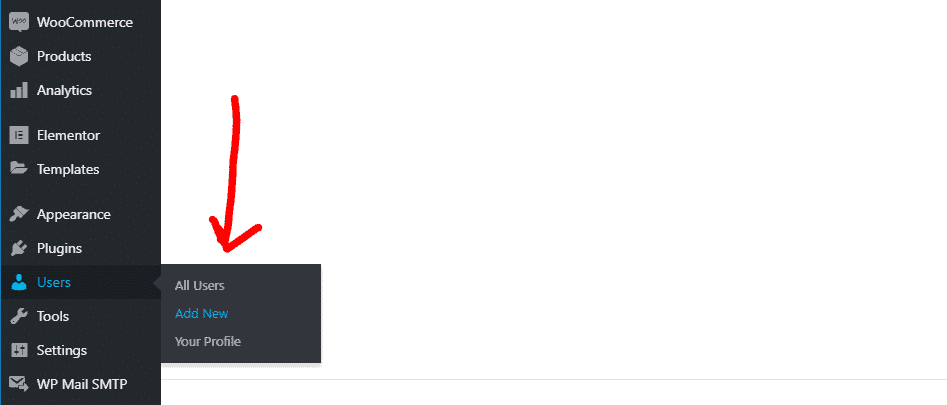
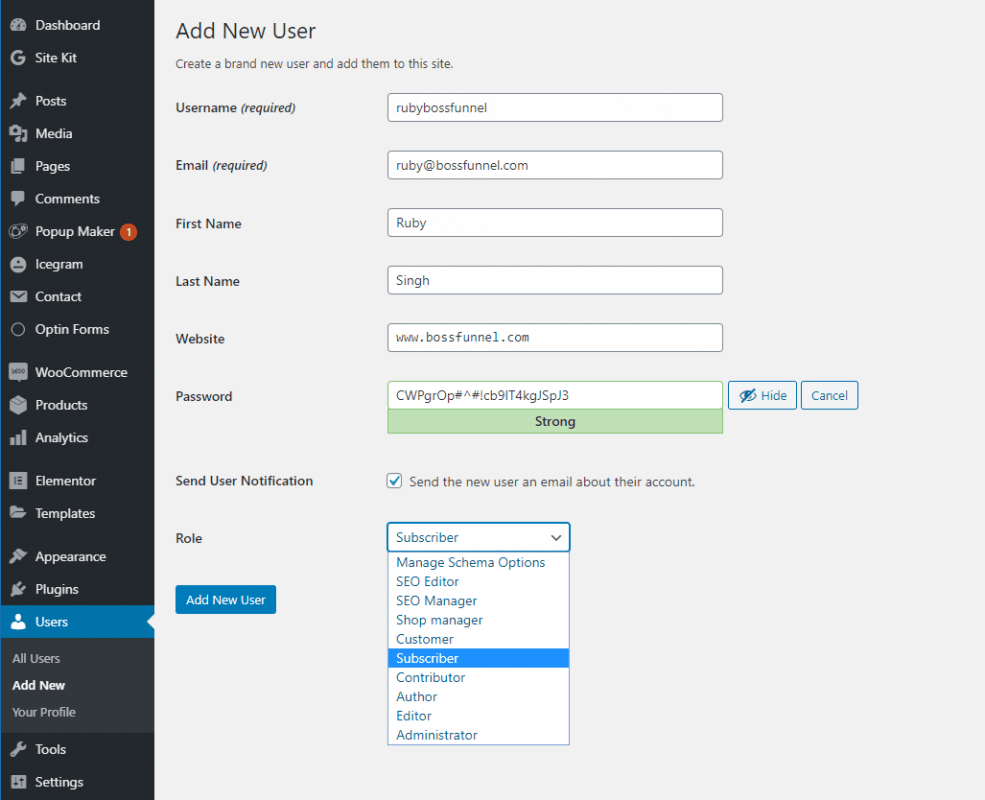
Enter all the necessary information for the new user, defining his role as “Administrator” and click “Add New User” .
Step 2 – Removing the admin user
After that, exit the management system, log in with a new account and delete the admin user from the system in one of the ways:
Method 1 – In the main menu on the left, select Users >> All Users. Hover over the admin username and you will see the “Delete” function.
Method 2 – In the main menu on the left, select Users >> All Users. Find the admin user, check the box and select “Delete” from the “Actions” drop-down menu. After that, click on the “Apply” option under the list of users. This option is convenient if you need to delete several users at once.
You can also change the username admin through a database query:
UPDATE wp_users SET user_login = ‘new_login’ WHERE user_login = ‘admin’;
This method has a minus: the author for posts written by admin will not be changed. In order to fix this, you need to make another request to the database:
UPDATE wp_posts SET post_author = ‘new_login’ WHERE post_author = ‘admin’;
2. Use a complex and unique password
Protecting the WordPress admin area is, of course, impossible without a complicated, good password. It is important that it be unique and includes numbers, letters of different registers, punctuation marks, characters, and more. Passwords like: pass, 1q2w3e4r5t6y, 87654321, qwerty, abc123, 111111, 1234, date of birth, etc. – are not reliable, but many users continue to use them. An example of a good password is pcVaOF8r39. Of course, it will be difficult for you to remember such a password, but for this, there are a number of programs that store and generate passwords, and can also be integrated into your browser interface (for example, Password Agent, KeyPass, Roboform, etc.)
If you would still like to remember your passwords by heart, we recommend creating a combined password from a familiar name/word with a few capital letters/numbers in random places and a few special characters at the beginning or end. Such a password will also be difficult to select, but it will be easy enough to remember.
Remember to update your passwords regularly.
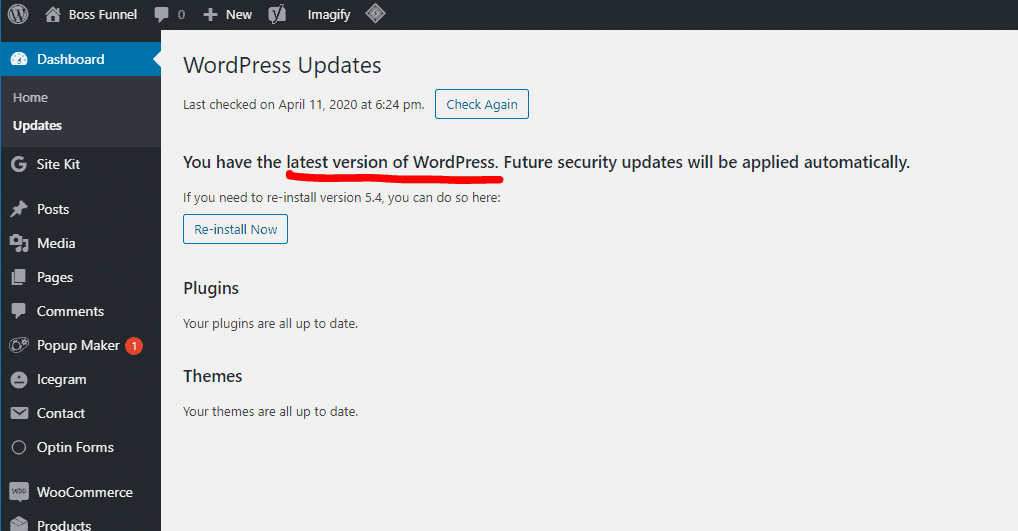
3. Upgrade your WordPress version
WordPress cares about its users, and therefore in the administrative control panel, you can find notifications about the release of a new version. We recommend that you upgrade as soon as you see it because one of the most common security holes in your site is using an outdated version of the platform.
4. Hide the version of WordPress
WordPress by default adds the current version number to the source code of its files and pages. And since quite often it’s not always possible to update the WordPress version on time, this can become a weak point of your website. Knowing which version of WordPress you have, a hacker can do a lot of harm.
Using the functions.php file, you can prevent the output of version information for your platform. To do this, you need to open the functions.php file located in the root folder of the current theme of your website (wp-content / themes / current_wordpress theme) , and add the following code:
remove_action (‘wp_head’, ‘wp_generator’);
Or you can add the following code to the functions.php file :
/ * Hide WP version strings from scripts and styles
* @return {string} $ src
* @filter script_loader_src
* @filter style_loader_src
* /
function fjarrett_remove_wp_version_strings ($ src) {
global $ wp_version;
parse_str (parse_url ($ src, PHP_URL_QUERY), $ query);
if (! empty ($ query [‘ver’]) && $ query [‘ver’] === $ wp_version) {
$ src = remove_query_arg (‘ver’, $ src);
}
return $ src;
}
add_filter (‘script_loader_src’, ‘fjarrett_remove_wp_version_strings’);
add_filter (‘style_loader_src’, ‘fjarrett_remove_wp_version_strings’);
/ * Hide WP version strings from generator meta tag * /
function wpmudev_remove_version () {
return ”;
}
add_filter (‘the_generator’, ‘wpmudev_remove_version’);
In addition to the above, in the folder of any WordPress theme, you will find the header.php file. It also indicates the version of your installation, which is very interesting for the hacker, as mentioned earlier. By deleting the following line from the file, you will get rid of this extra information:
<meta name = ”generator” content = ”WordPress <? php bloginfo (‘version’); ?> ”/>
5. Download themes and plugins from trusted resources
WordPress is so widespread that more and more developers create ready-made themes and plugins for it. While most of them will facilitate the work with your site and expand its functionality, some may hide quite unpleasant consequences in the form of viruses and open doors for hackers. Use only proven resources to download themes and plugins, for example, wordpress.org, and pay attention to all warnings about file malware. As with WordPress itself, it’s important to keep your plugins up to date with the latest versions. For this, you can use ManageWP. With ManageWP, you can manage multiple WordPress websites from one dashboard. Schedule backups, migrate WordPress website, automate updates, monitor website traffic, and SEO.
TIP: You can get access to 3000+ themes and plugins for just $10/mo from PluginTheme.net. All the premium themes and plugins will be 100% spam free, they are GPL Licensed hence you can use them legally.
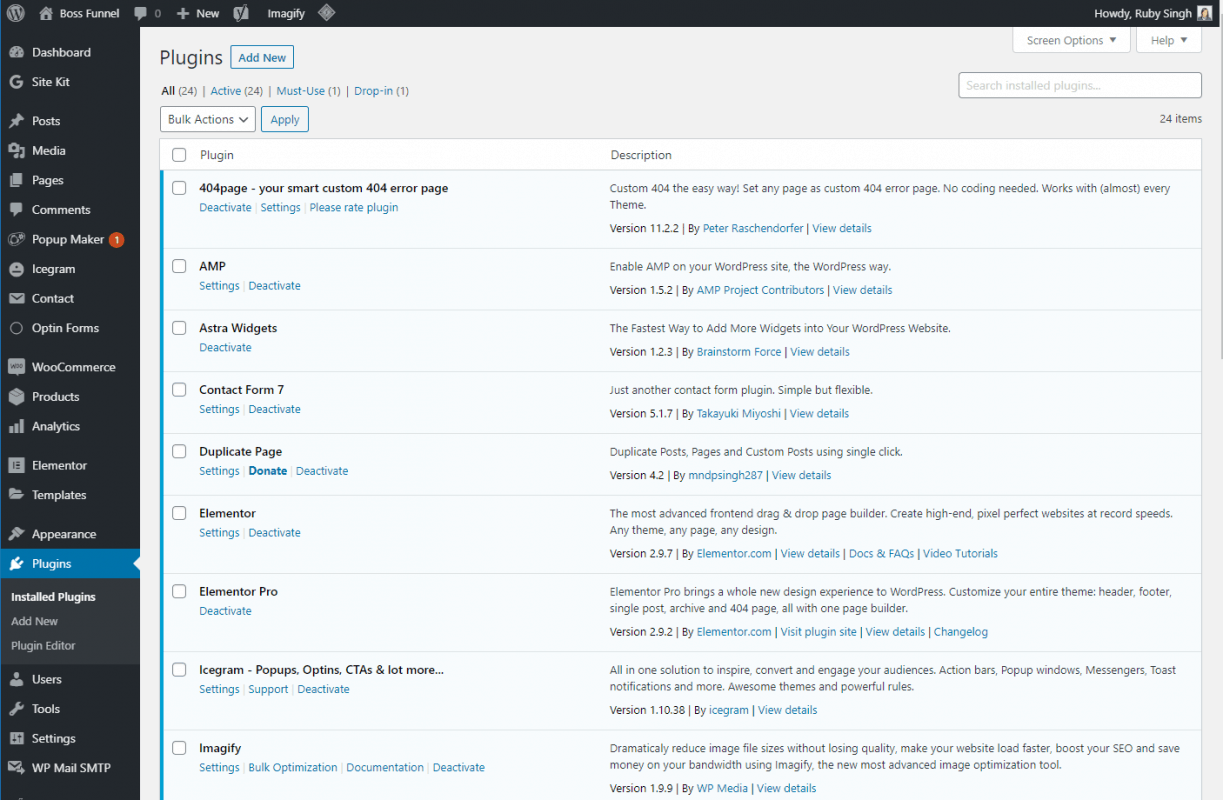
6. Do not store unnecessary files
Inactive extensions can pose a serious threat to the security of your site. Therefore, feel free to delete all unused plugins and themes. For example, you installed woocommerce plugins to test and choose which one you will use. After choosing, do not forget to delete all unnecessary.
7. Regularly check your local computer for viruses
The implementation of various steps to ensure the security of a site on WordPress is good, but you need to monitor your computer. You must have a constantly updated antivirus installed. Otherwise, you risk infecting your website by uploading virus files to it.
8. Make backup copies of the site
Not all attackers can be prevented, but just one successful attack can destroy all efforts to work on your site. We recommend making regular website backups. Many hosting companies provide the option of server backups, and in which case, you can restore the site from a copy that is available on the server.
But we recommend that you do not limit yourself to such server backups since it is important to take care of backups on your part as well. You can manually create copies of your site at regular intervals or before important updates, but there are also a number of plugins that can help you automatically create copies of WordPress. You can check out the various options here: wordpress.org/plugins/tags/backup
By installing the WordPress Database Backup plugin, you can additionally secure your site database. Plugin settings allow you to set the option of daily sending a backup copy of the database to your contact mailbox.
9. Use a secure connection
If you prefer to upload your files using an FTP client, use the secure protocol for connecting to the SFTP server.
10. Create a .htaccess file
The .htaccess file is the main configuration file for the webserver, which is located in the root folder of your website. If you do not have this file, just create it using a text editor. The file has no extension, so you just need to name the new .htaccess file.
This is a kind of standard WordPress .htaccess file:

Important: All changes to .htaccess must be made only after #END WordPress.
By adding various code variations to this file, you can significantly secure your site:
The code blocking access to your wp-config.php file that contains important information necessary for connecting to the MySQL server and database:
<Files wp-config.php>
order allow, deny
deny from all
</Files>
Code that restricts access to the .htaccess file itself:
<files .htaccess>
order allow, deny
deny from all
</files>
In the same way, you can protect any other file by simply replacing the “.htaccess” code with the name of the required file.
Code that restricts access of users with a specific IP address to your site:
order allow, deny
allow from all
deny from XXXX
So you can deny access to suspicious users, spammers, and bots, as their IP addresses are often duplicated. Thus, you will also reduce the load on the server.
The code that gives access to your site only to users with a specific IP address:
order deny, allow
deny from all
allow from XXXX
Code that restricts access to the admin control panel of your site (this is convenient if you have a static IP address and you can set access only for yourself):
AuthUserFile / dev / null
AuthGroupFile / dev / null
AuthName “Access Control”
AuthType Basic
order deny, allow
deny from all
allow from XXXX
Code prohibiting tracking of HTTP headers:
RewriteEngine On
RewriteCond% {REQUEST_METHOD} ^ TRACE
RewriteRule. * – [F]
SQL injection protection code is the most common type of attack on WordPress sites:
RewriteCond% {QUERY_STRING} (\ <|% 3C). * Script. * (\> |% 3E) [NC, OR]
RewriteCond% {QUERY_STRING} GLOBALS (= | \ [| \% [0 – 9A-Z] {0, 2}) [OR]
RewriteCond% {QUERY_STRING} _REQUEST (= | \ [| \% [0 – 9A-Z] {0.2})
RewriteRule ^ (. *) $ Index.php [FL]
Code that will not allow viewing folders on your server by typing their full path:
Options –Indexes
For example, typing https://yourdomain.com/wp-includes in the browser, you will see the entire contents of the wp-includes folder, which, of course, is not safe. With this code, users will see a response from the server – 403 Forbidden.
An alternative method of hiding subfolders is to create an empty index.php file in each directory. Thus, when you open https://yourdomain.com/wp-includes, the browser displays a blank page.
Code that protects against the use of XSS injection and attempts to modify the GLOBALS and _REQUEST variables:
Options + FollowSymLinks
RewriteEngine On
RewriteCond% {QUERY_STRING} (\ <|% 3C). * Script. * (\> |% 3E) [NC, OR]
RewriteCond% {QUERY_STRING} GLOBALS (= | \ [| \% [0 -9A-Z] {0,2}) [OR]
RewriteCond% {QUERY_STRING} _REQUEST (= | \ [| \% [0-9A-Z] {0,2})
RewriteRule ^ (. *) $ Index. php [F, L]
For the same purpose, you can use a number of WordPress plugins, which you can find here: wordpress.org/plugins/tags/xss
Hotlinking protection code:
RewriteEngine On
RewriteCond% {HTTP_REFERER}! ^ Http: // (. + \.)? Yourdomain \ .com / [NC]
RewriteCond% {HTTP_REFERER}! ^ $
RewriteRule. * \. (Jpe? G | gif | bmp | png) $ /images/nohotlink.jpg [L]
Hotlinking is the insertion of an image from your server onto someone else’s website \ blog. Traffic at the same time goes directly to your server.
Using the code above, you can force the server to check where the request came from: if from the pages of your website, the server gives the image to the user without problems; if from someone else’s website, it shows an image with an error.
11. Change the prefix of the database tables
WordPress protection against hackers will also increase if you remove the initial wp_ prefix – this will complicate the search for attackers. Consider several ways:
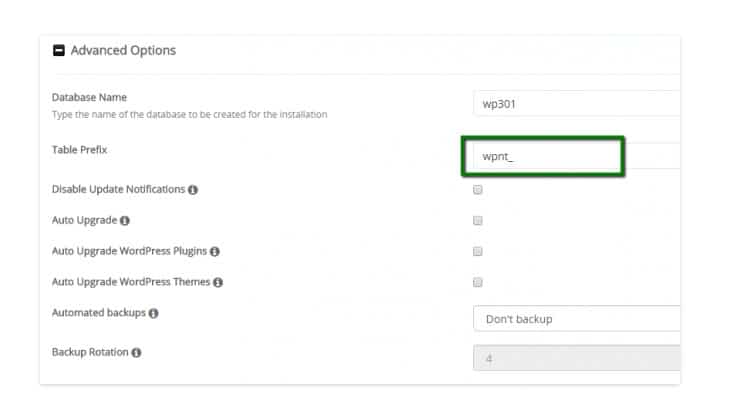
Method 1 – Suitable for new installations through Softaculous
If your hosting provider gives you the opportunity to use the Softaculous script to install WordPress, you can change the prefix during the initial installation: in the Advanced Options section, you will need to make the necessary changes.
Method 2 – For existing sites and fresh installations of WordPress
If your WordPress has been installed for a long time and the site is working, then you can change the database prefix using the phpMyAdmin program.
Select the required database from the list and make the following database request:
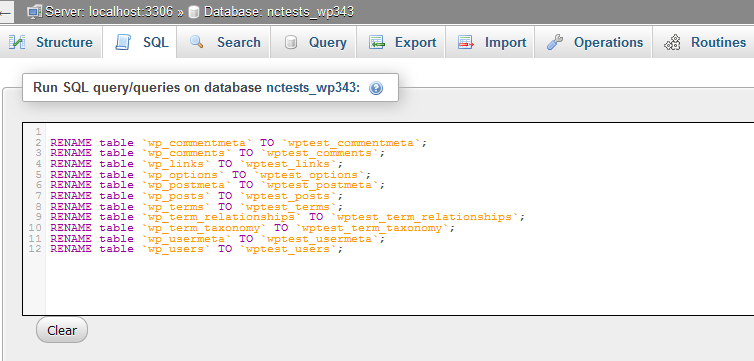
RENAME table `wp_commentmeta` TO` newprefix_commentmeta`;
RENAME table `wp_comments` TO` newprefix_comments`;
RENAME table `wp_links` TO` newprefix_links`;
RENAME table `wp_options` TO` newprefix_options`;
RENAME table `wp_postmeta` TO` newprefix_postmeta`;
RENAME table `wp_posts` TO` newprefix_posts`;
RENAME table `wp_terms` TO` newprefix_terms`;
RENAME table `wp_term_relationships` TO` newprefix_term_relationships`;
RENAME table `wp_term_taxonomy` TO` newprefix_term_taxonomy`;
RENAME table `wp_usermeta` TO` newprefix_usermeta`;
RENAME table `wp_users` TO` newprefix_users`;
where “newprefix_” must be replaced with the new prefix that you want to use instead of the “wp_” prefix.
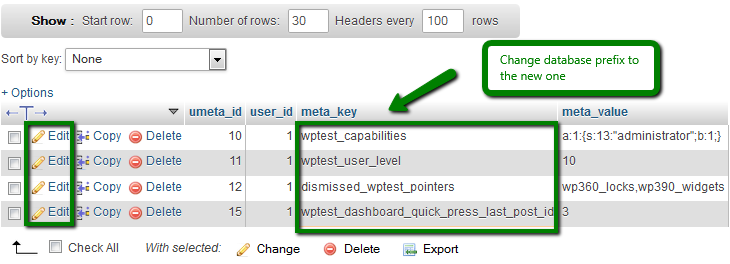
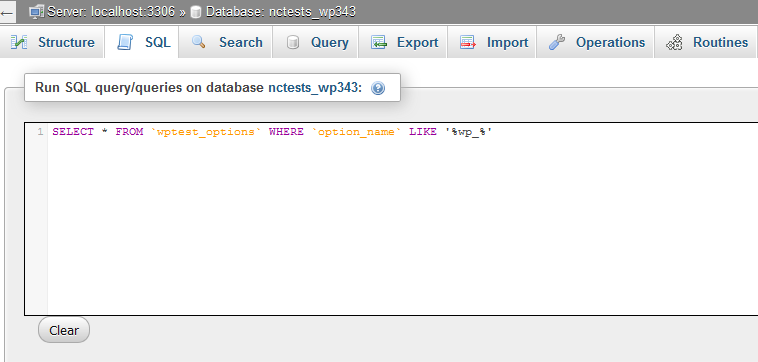
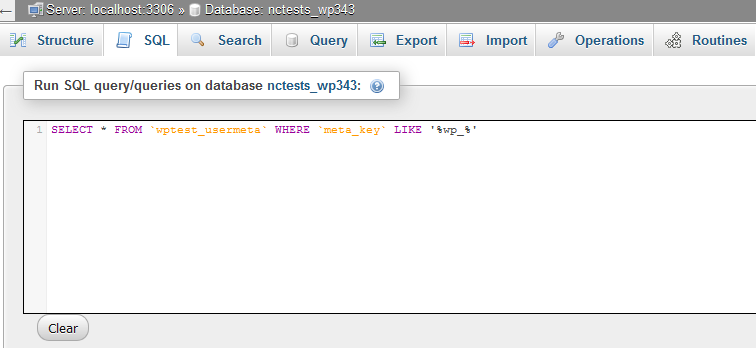
To make sure that all changes were successful and the wp_ prefix is no longer used in the _options and _usermeta table , you will need to make one more query to the database:
SELECT * FROM `newprefix_options` WHERE` option_name` LIKE ‘% wp_%’
SELECT * FROM `newprefix_usermeta` WHERE` meta_key` LIKE ‘% wp_%’
As a result, you can find a number of prefixes that you will need to manually rename using the Edit button:
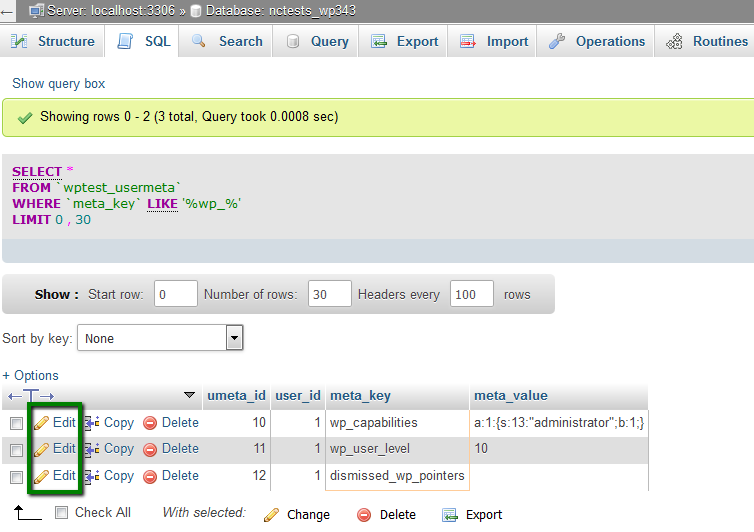
The number of changes you will need to make may vary. But you must change all the wp_ prefixes to your new prefix for the website to function properly.
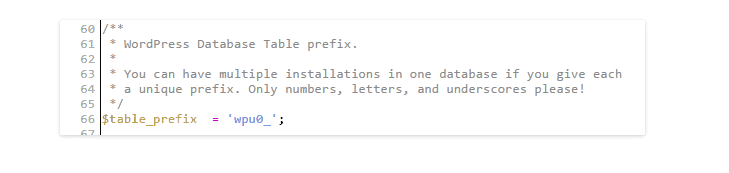
After that, do not forget to also make changes to the prefix in the wp-config.php file:
You can also use special plugins to change the database prefix: Change DB prefix or Change table prefix.
12. Limit the number of access attempts
Most often, attackers make a huge number of attempts to enter your site, picking up a password. You can configure the system so that the IP address is blocked for several hours after a certain number of failed login attempts.
You can use additional plugins for this, for example, Login LockDown or Limit Login Attempts. In the settings of these plugins, you can independently set the number of login attempts and the blocking time.
Additionally, it is possible to remove the display of the message that the entered username and password are incorrect. After all, this is also information that can help an attacker.
To remove the output of this message, you need to open the functions.php file located in the folder of the current theme of your website (wp-content / themes / current_WordPress_tempo) and add the following code:
add_filter (‘login_errors’, create_function (‘$ a’, “ return null; ”));
13. Remove readme.html and license.txt
The readme.html and license.txt files are present in the root folder of any WordPress installation. You do not need these files, and hackers can endow them with their atrocities. For example, to find out the current version of your WordPress and much more useful for hacking a website. We recommend that you remove them immediately after installing WordPress.
14. Use an SSL certificate.
To transfer secure information and confidentiality of data exchange, we recommend using the SSL protocol. This is especially true for online stores if you do not want personal data about your customers to be transmitted in an unprotected way.
First of all, you will need to purchase an SSL certificate and install it for your domain name.
TIP: You can now buy free SSL from Let’s Encrypt.
After that, you can establish the mandatory use of the SSL protocol when entering the control panel of your site. To do this, open the wp-config.php file located in the root folder of your website and add the following line:
define (‘FORCE_SSL_ADMIN’, true);
15. Modify the wp-config.php file
By adding this code to the wp-config.php file, you can also strengthen the protection of your website:
Restriction on changes to themes and plugins:
define (‘DISALLOW_FILE_EDIT’, true);
Disabling the ability to install and remove plugins:
define (‘DISALLOW_FILE_MODS’, true);
Adding salt keys or so-called security keys: first you will need to find such lines in the wp-config.php file:
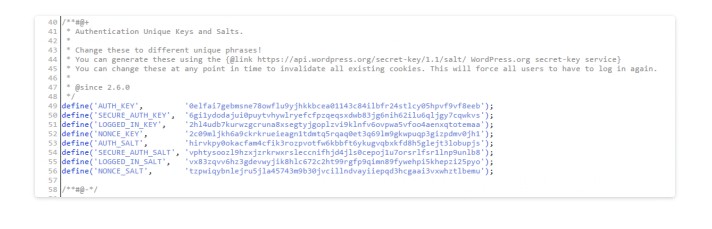
You will see that the keys are already installed and can be changed. Or you will see lines of this type: ‘put your unique phrase here’, which means that the keys have not been set yet:
/ ** # @ +
* Authentication Unique Keys and Salts.
*
* Change these to different unique phrases!
* You can generate these using the {@link https://api.wordpress.org/secret-key/1.1/salt/ WordPress.org secret-key service}
* You can change these at any point in time to invalidate all existing cookies This will force all users to have to log in again.
*
* @since 2.6.0
* /
define (‘AUTH_KEY’, ‘put your unique phrase here’);
define (‘SECURE_AUTH_KEY’, ‘put your unique phrase here’);
define (‘LOGGED_IN_KEY’, ‘put your unique phrase here’);
define (‘NONCE_KEY’, ‘put your unique phrase here’);
define (‘AUTH_SALT’, ‘put your unique phrase here’);
define (‘SECURE_AUTH_SALT’, ‘put your unique phrase here’);
define (‘LOGGED_IN_SALT’, ‘put your unique phrase here’);
define (‘NONCE_SALT’, ‘put your unique phrase here’);
Just follow the link api.wordpress.org/secret-key/1.1/salt/ , where new keys will be generated. Copy them and paste into the wp-config.php file.
These salt keys are used to enhance the security of information stored in the cookie of users. They complicate the process of breaking user passwords.
16. Use two-factor account authentication
To enhance the security of your passwords, several types of authentication are increasingly used. After you enter the password on the site, you will be sent a request for a new one-time password, which you will receive by contact phone number or email (you can click on a specific link from the letter). Therefore, even if your primary password has been cracked, the hacker will not be able to log into your account without access to your phone or email.
One of the most popular WordPress two-factor verification plugins is Google Authenticator and Keyy Two-Factor Authentication.
17. Use security plugins
In addition to all of the above ways to secure your website, there are also a large number of special plugins designed for WordPress. You can find them here: wordpress.org/plugins/tags/security
I would like to mention some plugins separately:
This is a WordPress security plugin that allows you to crawl your website to look for malicious code, gaps and loopholes left by hackers, showing website analytics and traffic in real time. There is also the ability to configure automatic scanning and much more.

This plugin checks your website for various security vulnerabilities and offers a number of methods to fix them. For example, passwords, different file permissions, database protection, WordPress version information protection, admin protection, and more.
This plugin allows you to secure user accounts and logins, databases and the file system, prevent brute force attacks (attacks related to password guessing), scan the site and more.
Now my personal favorite, Sucuri. Recently, one of my client’s eCommerce website was hacked and some malicious code was inserted by the hackers. We took the help of Sucuri, and within no time our website was restored and secured with an additional firewall.
Here is the support chat snapshot,

We also recommend the WordPress LoginLockDown plugin to protect the admin panel, which protects against password and login guessing.
No matter how sad this may sound, WordPress protection is a complicated thing, and the methods described in this article do not guarantee 100% that your site will be completely protected from any actions of scammers. However, you should not neglect them, as they will significantly reduce the possibility of hacking the site by attackers.