Every new blogger wants to monetize their blogs with Adsense, and many of them fail because of the strict Google Adsense policies.
Everything You Need to Know About Google AdSense
The following article is entirely based on my personal experience. Here are some theoretical points that are clear to everyone, and some secrets that will help you to earn more with Google Adsense. This article is useful for both the beginner and the one who is already working with contextual advertising.
As a beginner blogger, if you want to convert your blog into a money-making blog, then Google Adsense is the #1 ad network you can use to monetize your blog.
Every new blogger wants to monetize their blogs with Adsense, and many of them fail because of the strict Google Adsense policies.
The good news is,
If you follow some basic rules and maintain your blog like a real business from the starting of your blog, you’ll definitely get Google Adsense approval with your new blog.
I’m going to show you some Google Adsense approval tricks and the essential things you must do before applying for Google Adsense.
What is Google AdSense?
What is Adsense? Google Adsense is a CPC (cost-per-click) advertising program that allows publishers (anyone wanting to put ads on their websites) to insert a small amount of HTML into their sites and have ads appear that are targeted and relevant to the content of the site.
The good news is that Adsense is about the easiest way for bloggers or webmasters to start making money with their sites. After installing the ad code in your site, the Adsense spiders will crawl your site to see what all your pages are about.
They then check their inventory of ads and put related ads next to each of your articles. This works out well for everyone as someone reading an article on gardening is much more likely to buy gardening tools than someone who is reading an article about car tires.
How Does AdSense Work (FOR PUBLISHERS)?
So, how does Adsense work? Should I run Adsense on my blog? It starts with the advertisers who choose which keywords they would like to advertise on. Let’s suppose I want to advertise my new line of gardening tools that I just created. I would bid on certain keywords like “gardening, gardening tools, tillers, pulling weeds, etc”
The Adsense spiders would then match my ads up with:
- Those specific keywords that people type into Google and display them to the top and right of the search results
- Websites (like yours) that display Adsense ads.
The Adsense folks will send out Robots to crawl your site to see what all your content is about. If they find that you have content that has some of the same keywords that I (as the advertiser bid for) then my ads will show up on your site next to your article about gardening tools.
For more about how Adsense works check out Google’s help page.
I find that newbie’s always want to know how much Google Adsense is going to pay before they put it on their sites. As much as I wish it was a simple question to answer, it really isn’t.
How Much Does AdSense Pay?
Adsense pays on a pay-per-click (PPC) basis, so publishers get paid based on how many clicks they get to their ads. The pay for each click can be as low as pennies and as high as $10 (in very rare cases).
How Much Does AdSense Pay Per Click?
From the variety of blogs I have had I would say expecting to be paid 15-50 cents per click is a decent average. Certain niches will find that they rarely get more than 15 cents a click and other niches may rarely get less than 50 cents per click.
The price is determined by a few factors, but the biggest is the demand from advertisers to advertise for a certain keyword phrase. So, say you write an article called “Gardening tools for beginners”; advertisers who sell gardening tools will essentially be competing to advertise next to your article. If there is a lot of demand from them, then they will have to pay more to advertise next to your article. When they pay more, you will in turn earn more from each click.
WARNING: DO NOT CLICK YOUR OWN ADS UNDER ANY CIRCUMSTANCES!
The whole Adsense system is based is dependent on the hope that advertisers are not getting false clicks and as a result they are quick to close the account of anyone who they SUSPECT is generating false clicks. Don’t encourage readers to click them, don’t tell your friends and family to click them, and definitely don’t click them yourself. For as much money as Google makes you can rest assured that they have spent millions of dollars on tools to detect false clicks and they are very good at finding the culprits.
So, How Do You Find Keywords That Make More Money?
The easiest way to do this is to use the Google Keyword Planner.
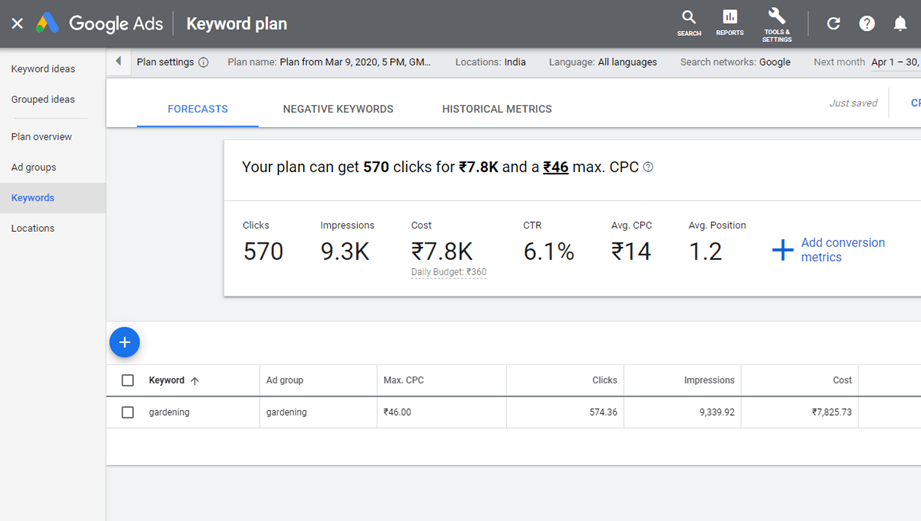
Now you will see your list of keywords and their average CPC that the ADVERTISER will have to pay. I would go ahead and click the Estimated Avg. CPC column to sort it from high-to-low.
BEST PRACTISES
I would suggest using these figures as a gauge to which topics and/or niches might have better-paying Adsense ads, rather than making assumptions about what you will earn. There are a lot of variables at play and it will be impossible to make accurate predictions on what you will earn.
Thing You Must Do Before Applying For Google AdSense
1. WRITE HIGH-QUALITY CONTENT
Don’t fill your blog with plagiarized articles. Write some unique, valuable, engaging, and high-quality content for your targeted audience.
Write in-depth and well-optimized blog posts with above 1000 words.
Also, Adsense will not approve your application if you write Adsense prohibited content.
So, make sure your blog has some high-quality content before you apply for Google Adsense.
TIP- I recommend adding 5 posts, 1500 words each before applying.
2. MAKE YOUR BLOG POSTS SEO FRIENDLY
You should optimize your high-quality blog content with the Meta title and description tag.
Google Adsense may use their crawler bots to check your complete site because it’s not possible for the Adsense team to visit and review hundreds of websites that have applied for Adsense approval.
If you are using WordPress, install the free Rank Math Plugin to optimize your blog content for search engines easily.
You can know more about Rank Match here-
These simple tactics can help you rank higher on Google too.
3. DESIGN A USER-FRIENDLY AND PROFESSIONAL-LOOKING BLOG
You should design a user-friendly site with a clear navigation menu to help your visitors find important pages.
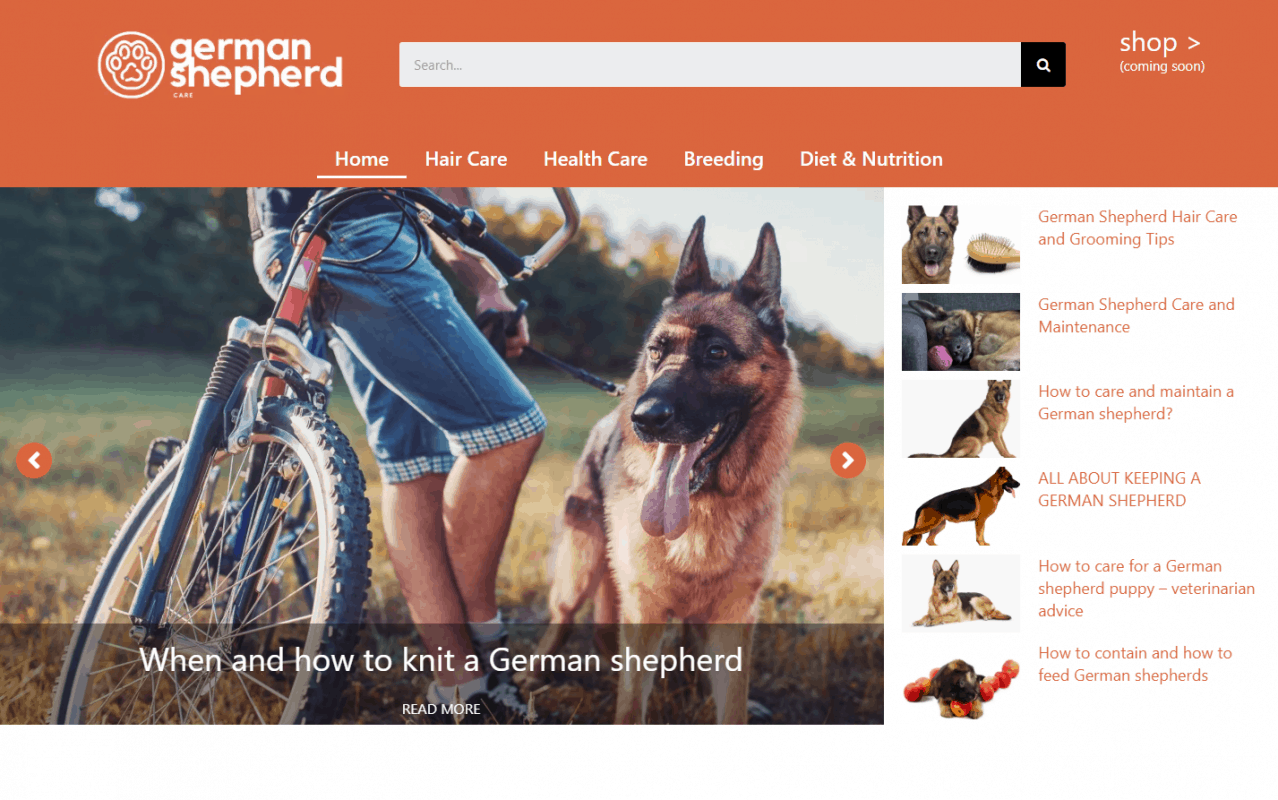
Also, make sure your blog is professionally designed and responsive to improve user experience. Make sure your website is mobile friendly.
For my blogs, I’m using Astra. Astra is fast, fully customizable & beautiful WordPress theme suitable for blog, personal portfolio, business website and Woo Commerce storefront. It is very lightweight (less than 50KB on frontend) and offers unparalleled speed. Built with SEO in mind, Astra comes with Schema.org code integrated and is Native AMP ready so search engines will love your site. It offers special features and templates so it works perfectly with all page builders like Elementor. I prefer designing my homepage with Elementor.
Here is a list of plugins you should use in order to optimize your website.
- Rank Match SEO
- Elementor Pro
- Astra Theme Pro
- Imagify to optimize your websites images
- Site Kit by Google for Analytics and Search Console
- WP Rocket or Litespeed Cache
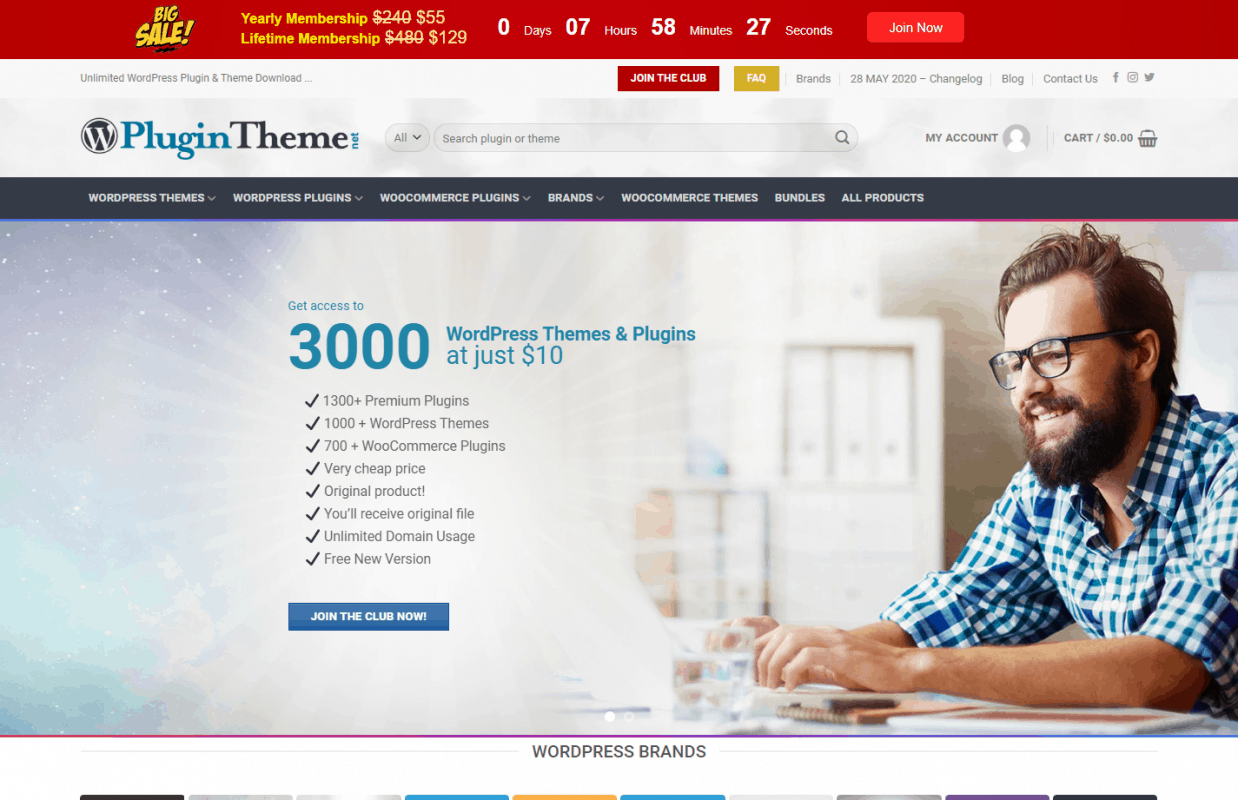
TIP: You can get access to 3000+ themes and plugins for just $10/mo from PluginTheme.net. All the premium themes and plugins will be 100% spam free, they are GPL Licensed hence you can use them legally.
4. CREATE MUST-HAVE PAGES
There are some pages which your blog must have before you apply for Google Adsense.
Such as about page, privacy policy page, terms and condition page and contact page.
A privacy policy is required by law if you collect personal information from users, and it’s necessary if you are going to use Google Adsense ads on your blog.
You can copy and use someone else’s privacy policy and it doesn’t hurt your blog SEO health or reputation.
After all, there are millions of privacy policy pages and they are almost the same.
5. MAKE SURE YOU’RE 18+
Adsense Terms and Conditions clearly notify that they only accept applications from applicants who are over 18.
If you’re under 18, you can ask your parents or guardian and sign up for Adsense using their information.
6. ENSURE YOU DON’T USE COPYRIGHTED IMAGES
Adsense doesn’t approve blogs if they noticed copyrighted contents.
Maybe you’re using copyrighted images without taking permission from the owner. Keep in mind that it’s illegal and harmful to your business.
So, make sure you’re using images by taking permissions, or you’re using copyright free images on your blog.
TIP: You can use a number of free tools; I can advice using the following.
FREE BRANDING & LOGO
- Logaster: Professional online logo maker & generator.
- Squarespace Free Logo: You can download free low-res version for free.
- Signature Maker: A free web based tool that creates your handwritten digital signature.
FREE IMAGE EDITORS
- Canva: Amazingly simple graphic design for bloggers.
- Pixlr: Pixlr Editor is a robust browser photo editor.
- Skitch: Get your point across with fewer words.
- Easel.ly: Empowers anyone to create & share powerful visuals.
- Social Image Resizer Tool: Create optimized images for social media.
- Placeit: Free product mockups & templates.
- Recite: Turn a quote into a visual masterpiece.
- Meme Generator: The first online meme generator.
- Pablo: Design engaging images for your social media posts in under 30 seconds.
FREE STOCK PHOTOGRAPHY
- Stock Up: Best free stock photo websites in one place.
- Pexels: Best free photos in one place.
- All The Free Stock: Free stock images, icons, and videos.
- Unsplash: Free (do whatever you want) high-resolution photos.
- Splashbase: Search & discover free, hi res photos & videos.
- Startup Stock Photos: Go. Make something.
- Jay Mantri: Free pics. do anything (CC0). Make magic.
- Moveast: This is a journey of a portuguese guy moving east.
- Travel Coffee Book: Sharing beautiful travel moments.
- Designers Pics: Free photographs for your personal & commercial use.
- Death to the Stock Photo: Free photos sent to you every month.
- Foodie’s Feed: Free food pictures in hi-res.
- Mazwai: Free creative commons HD video clips & footages.
- Jéshoots: New modern free photos.
- Pixabay: Free high quality images.
- Super Famous: Photos by Dutch interaction designer Folkert Gorter.
- Picography: Free hi-resolution photos.
- Pixabay: Free high quality images.
- Magdeleine: A free high-resolution photo every day.
- Snapographic: Free stock photos for personal & commercial use.
- Little Visuals: 7 hi-res images in your inbox every 7 days.
- Splitshire: Delicious free stock photos.
- New Old Stock: Vintage photos from the public archives.
- Picjumbo: Totally free photos.
- Life of Pix: Free high-resolution photos.
- Gratisography: Free high-resolution photos.
- Getrefe: Free photos.
- IM Free: A curated collection of free resources.
- Cupcake: A photographer’s treat by Jonas Nilsson Lee.
- The Pattern Library Free patterns for your projects.
- Public Domain Archive: New 100% free stock photos.
- ISO Republic: High-quality, free photos for creatives.
- Stokpic: Totally free photos.
- Kaboompics: The best way to get free photos.
- Function: Free photo packs.
- MMT: Free stock photos by Jeffrey Betts.
- Paul Jarvis: Free high-resolution photos.
- Lock & Stock Photos: Free stock photos for you.
- Raumrot: Free high-resolution picture.
7. MAKE YOUR SITE ABOUT ONE TOPIC
If you’re submitting a site with less than 100 pages, stick to one topic, and provide value for one specific audience. I’ve seen a lot of rejected sites are “magazine” type sites that talk about anything and everything. (5 posts about childcare, 5 posts about sports, 5 posts about design, and 5 posts about SEO.)
Unless you have 100’s of pages on your site, don’t do that. Make your topic narrow. Make it about one thing only.
TIP: There are many tools to do your keyword research such as ahrefs, moz, semrush, keyword revealer. The main issue is that these tools are highly paid, so I can advise you to group buy SEO tools. You can visit ToolsZap.com, GroupBuySeoTools.org and buy SEO and other high paid tools for as low as $10/mo. You also have an option to buy any specific tool for much cheaper prices.
8. WAIT AT LEAST A MONTH
I would prefer you wait until your site is at least 1 months old before you apply. You can try it sooner, but it takes time to index your website on Google right?
Remember, a human being reviews your site. It’s not algorithmic.
Quality content is one thing, but if you have a site on a domain that was registered last week, with 20 posts slapped onto it, all published on the same day……
I think it’s a pretty obvious sign that you just threw something up to get your account approved.
9. DITCH CATEGORIES
If you don’t have over 10 posts in every category ditch them in your navigation.
I come across a lot of sites that were rejected from Adsense, and this is a common feature that everyone has on their site.
Having categories are a bad user experience if every category you click only has a few posts in them.
I’m assuming people do this to make their site look more vibrant and “full” but it actually has the opposite effect.
Ditch them.
10. LINK OUT TO OTHER HELPFUL SITES
Don’t be a dead end on the internet. Link out to helpful resources and sites.
But don’t just blindly link to random Wikipedia pages.
Link to actual helpful resources that support what you state in your articles, an example would be like this.
After maintaining a blog by following all the tips mentioned above, you can apply for Google Adsense and quickly get Adsense approval for your new blog.
Google AdSense Approval Process
Once you have signed up for Google Adsense, you need to add Adsense codes to your blog. Ads will show as blank until the final approval process doesn’t finish. It may take up to 1 or 2 weeks for the final review and approval. I usually get approval within 24 hours of applying as I strictly follow the above-mentioned steps.
After the final Adsense approval, you will get a confirmation email saying that ‘The site “yoursitename.com” is now ready to show Adsense ads.’
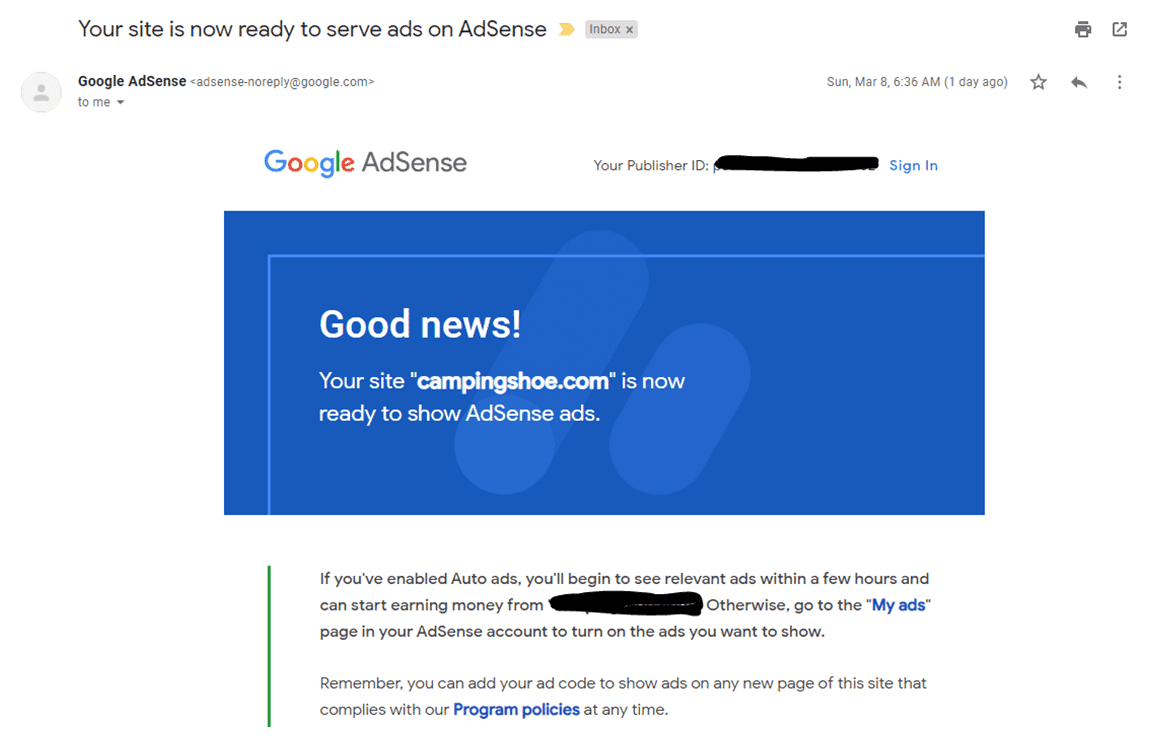
Yes, now you can add more ads on your site. Within a few hours, you’ll begin to see relevant ads and can start earning money from your Adsense approved blog or website.
If you are using WordPress I would advise you to use Google Adsense by WP QUADS to display your ads. I would suggest you not to use automatic ads by Google. Ad placement is one of the major reasons that affect your Adsense earning; you can read more on how to efficiently place Ads on your website here.
Congratulations,
You have completed all the steps of Google Adsense approval process. Once your earning reaches $100, Google will send you or wire transfer your earnings on your bank account.
Feel free to connect with me on Skype if you have any queries.
You can also join my Facebook group (6000+ members); it’s a community of entrepreneurs, business owners, startup founders, and freelancers etc. who are looking to grow their business.
BONUS:
Get free access to my eBook (Value- $99)-

GHW GUIDE TO GROWTH HACKING AND ENTREPRENEURSHIP
In this E-book, I have shared away my knowledge and how I came over my struggles as an entrepreneur, my principles that I know would help me grow much faster.
Google AdSense Policy Violations and their fix
- Google Adsense Valuable Inventory- No Content Error: How to fix it?
- Google Adsense Valuable Inventory- Templated Page Error: How to fix it?
- Google Adsense Valuable Inventory- Under Construction Error: How to fix it?
- Google Adsense- Scraped Content Error: How to fix it?
- Google Adsense Nonsensical Content Error: How to fix it?
Google Adsense – 8 Secrets to Success
1. Types of Sites Where Contextual Advertising is placed
First, you need to figure out your website’s nature. To make it simpler, I am dividing nature into two parts: with the community and without the community. We will need this when parsing the following points. The resources with the community include forums, blogs with an approximately constant audience. Whereas resources without a community are projects that are accessed by search engines, social networks, and so on.
In the first case, we must take care of each user (subscriber) so that the advertisement does not annoy and interfere with the user’s experience. In the second case, only the effect is essential to us: come – clicked – left – well done! Therefore, there will be qualitatively different approaches to google Adsense on such sites.
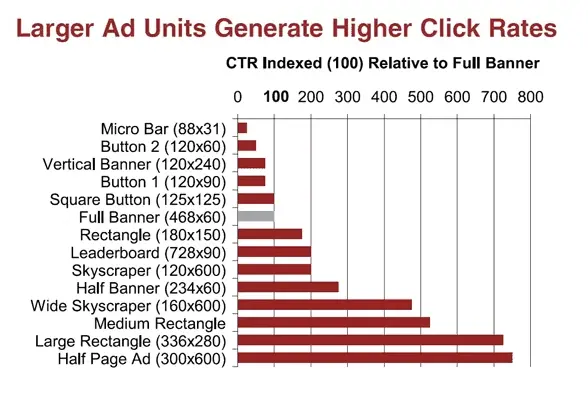
2. Size Matters
Of course, size matters in contextual advertising! We are only talking about the size of the ad unit. The effective blocks are as follows:
- board of honor (728х90);
- large rectangle (336×280);
- wide skyscraper (160×600).
In most cases, these blocks get more clicks. If the site does not have such a great advertising space, then you can use smaller sizes.

Now, Adsense allows you to add automatic ads onto your website. Should I use automatic ads? Of course, you can! But I would better suggest you use a combination of automatic ads and manual ads.
With recent Google Adsense Policy updates- You need to get approval for each site separately to place ads on that site. Even if you already have a fully approved Adsense account, you can’t place ads on any site from your existed Adsense account without getting approval for that new site.
3. Placement of Announcements
Perhaps this is the first moment that requires closer attention. The “correctness” of the implementation will primarily affect your earnings on Adsense. In the current contextual system, you can place an unlimited number of ads on your webpages. But, should I add as many numbers of ads? No, the first Ad on the page will fetch you the highest CPC, as the number of Ads tends to increase, Ads with lower bids will be shown. Thus, reducing the CPC of your ads.
For a board of honor (728×90), save a place in the header of the page.
Large rectangles are more clickable in the content immediately after the heading or after several lines (paragraph) on sites without a community (nevertheless, I mentioned the division). It’s better to place the ad on the left because people read mainly from left to right, and their eyes are more likely to fall on advertising.
If the content of the site is read, and not immediately flipped down (you try to take the place of the user and evaluate how they behave on your resource), then you can apply the wrap to a large rectangle. On one of my sites, the CTR of the wrapped block is kept in the range of 8-10% and sometimes reaches 12-15%.
Advertising should stand out a bit from the content, so it’s most effective to separate it a bit from it.
As for the skyscraper, the best place for it is in the sidebar. It’s better to use sites with the right sidebar because people are mostly right-handed and hold the mouse pointer more to the right (well, unless the project is not about left-handed people). True, there were cases when a skyscraper was placed at the top of the wraparound content and received a decent CTR.
At this point, I also want to make a special note. The title on the page should not be large, especially for projects without a community. First of all, attention should be drawn to the title of the ad, not the title.
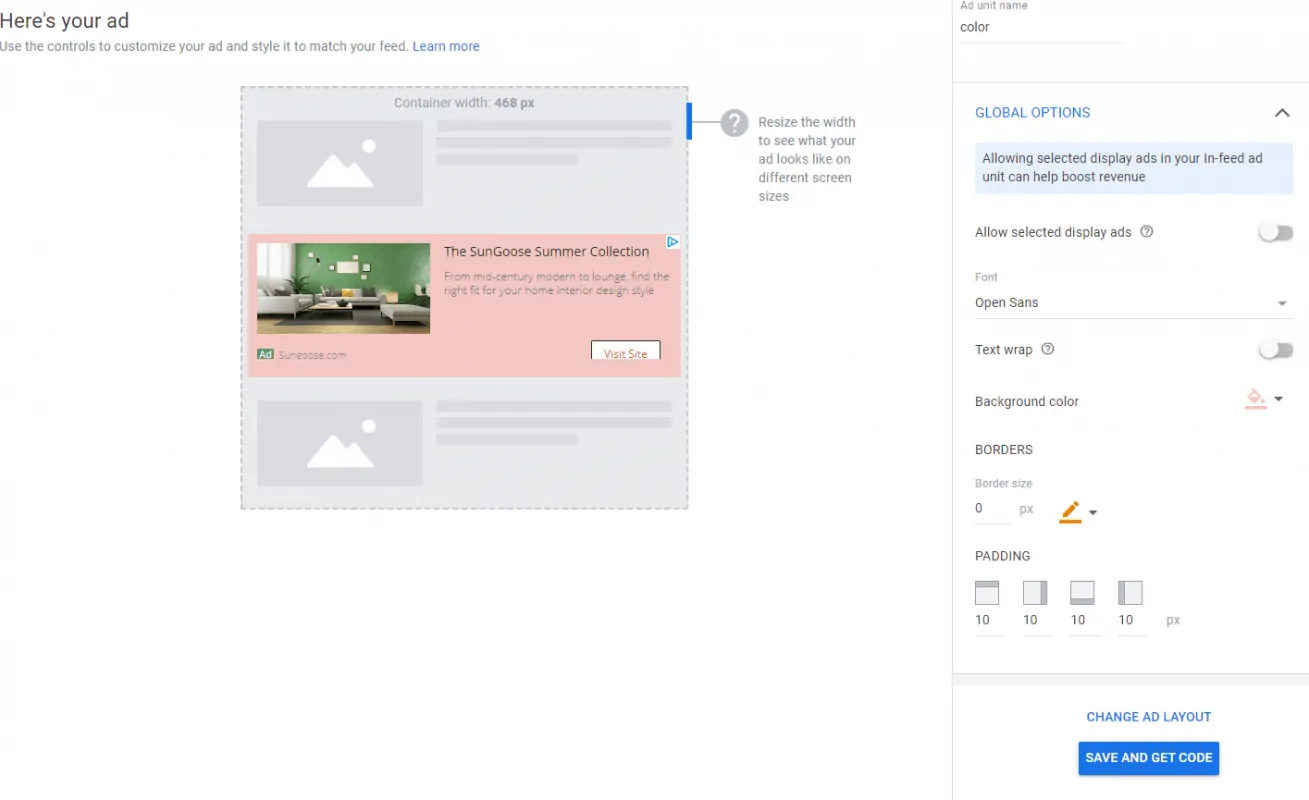
4. The Color Scheme of Google Adsense Ads
So we have chosen the right format for the ads, correctly placed them on the page of the site, now we need to colorize our google AdSense ads effectively. If the resource is with the community, then we should take care of the appropriate color scheme in the first place.
If one-time visitors from search engines mainly visit the site, then we should care more about the user. All we need is to make the color scheme attract his attention. Of course, one should not create scales with radical colors.
Yes, this announcement will force you to look at yourself due to excessive brightness, but then the user will turn his eyes away because these colors are very irritating.
For sites that have regular visitors, we select a color scheme similar to the color scheme of the project itself. This does not irritate the eyes, and visitors perceived the info as “useful” ads. Of course, there is a moment of memorization of advertising. When viewing the site, the user no longer pays attention to those places where the context mostly hangs. Therefore, you must either change the location or slightly change the color.
For sites without a community, if we use the color gamut of the resource for our ads, we must place them so that they are perceived as part of the content. But do not forget about the Google Adsense rules. Otherwise, you can get your account banned. If this does not bring the desired results, then you can change the background to attract more attention.
About six months ago, I was in my Google mail. I accidentally saw an Ad that had a bright but not annoying background. Suddenly I realized it was an interest-based targeting as I was looking for a gift for my brother. This background increased the CTR by about 50% on one of my sites. So keep an eye on the giants of Runet and the colors of their contextual ads.
In any case, there is no ready-made solution for all sites as a whole. There are only assumptions and advice. You should always experiment with the color scheme and look for the most effective.
There are both text and image ads on Google AdSense, so you need to use this flexibility. As I wrote above, it is better to have the right sidebar. Thus, image ads (in my experience) that appear in the right sidebar receive more clicks than text ads. Yes, the cost per click on such banners is lower, but in general, it still turns out to be more profitable.
Try it; maybe it will increase your profit.
If the advertisement is located in the sidebar directly under the menu, then it’s more efficient to use the text Ads as it will be perceived as a continuation of the menu (unless, of course, correctly choose the size and color scheme).
5. What are Channels and How to Use them Effectively?
Once upon a time, when I was just starting to get acquainted with Adsense, I immediately neglected the channels. They seemed to be very complicated and unnecessary. There was only one channel. But after a couple of months, I realized all their effectiveness.
Now, as a sniper, I have one announcement – one channel. Thanks to this, I can track the most effective and improve channels that have a low CTR. The main thing is their names so that they are associated with the placement. I call them as follows site-name of the block-location, for example, bossfunnel-banner-vertical-sidebar. Thanks to this name, I immediately imagine where the ad is located. It is very convenient and practical to use channels.
6. Is it Worth Monetizing RSS with Adsense?
Everything is simple here. If you have super valuable material and an RSS subscriber will never unsubscribe from you, then connect it to the Adsense system. In other cases, it is better to neglect this method of monetization – worry about your subscribers.
7. Are Link Blocks Effective?
The answer is yes. But not everywhere. Link blocks are useful only in those cases when they are a continuation or addition to the site menu. If you make it difficult for the user to distinguish between the resource menu and the link block, then they will give good CTR indicators. In this case, do not ignore the Google Adsense rules. Learn how to create Google AdSense Link Ads with new AdSense policies.
If you have any doubts about the correct placement, it is best to coordinate this with the Adsense support service. They will tell you whether this is possible or not. In other cases, link blocks are hardly noticeable to users. It is worth mentioning the appropriateness of their use. If you have every user on the account, then, first of all, you will give him good usability, and you will not stick Adsense in all places. Is that right? As a rule, the bids on the link blocks are insignificant.
8. Search from Google Engine
This type of site monetization will be pleasant to those who do not have their search on the Internet resource. Thanks to this, you kill two birds with one stone: organize a search from a leading world player and add extra cash to your pocket. Setting it up is easy enough. The only thing here is to fulfill two conditions:
- display search results on a separate page of your project (select the checkbox “Open search results on my site”). The Google Adsense ads here must exactly match the gamut of results. Due to this, the CTR is around 5-10%.
- Place the search box in a place convenient for the user on the site. It should also be in harmony with the design of the Internet resource.
Once, having set my search on a couple of resources, I got the necessary function for visitors and additional income.
Next, I would like to share with you those observations that I received over time, working with Google AdSense:
- The higher the CTR on the site, the lower the price per bid. Ads that receive more clicks become cheaper for the advertiser. In general, income from the site is growing.
- On trust sites, the CPC is higher. From personal experience: as the domain age increases, the number of pages indexed by Google increases the cost per click.
- The higher the block to the beginning of the document (in the source code), the more expensive the click will be. More expensive ads are placed at the top of the webpage because it is believed that the top of the document is the most relevant.
- It is necessary to experiment all the time on the arrangement of ad units and their color scheme. Without this, achieving high results with Google Adsense is almost impossible.
- The standard Google Ads palettes are very boring for Internet users, so it’s better to use your individual color scheme.
- Integrate your Google Adsense account into your google analytics account. This will allow you to analyze the most expensive traffic, the most clickable pages, and so on. Look here for pages and traffic that gives you the best conversion and revenue. No wonder they get a lot of clicks.
- Do not makeup with the design. It is best to use a white background without colorful elements with a discreet design.
- Look for irrelevant ads and filter them out (filter for competing ads).
How to Boost Google Adsense Profits?
Now talk about Google AdSense pricing. Knowing some of the details of CPC construction in this contextual environment can significantly increase your revenue.
As you know, in Google AdSense there is auction pricing, which is based on several parameters, such as, for example, the set maximum cost per click (bid) by the advertiser, CTR of contextual ads, and others. The highest bidder gets the first place. We need to optimize Google Adsense on the site so that such ads receive as many clicks as possible. Let’s discuss the main key points that everyone who needs to optimize the contextual advertising blocks on their site should know.
1. The Higher the Ad Block Code in the Page Code, The Higher the CPC in this Block
I see numerous sites on which ads are hanging in the header. There is a misconception that the most clickable places are in the header. Here is the heatmap provided by Google itself.
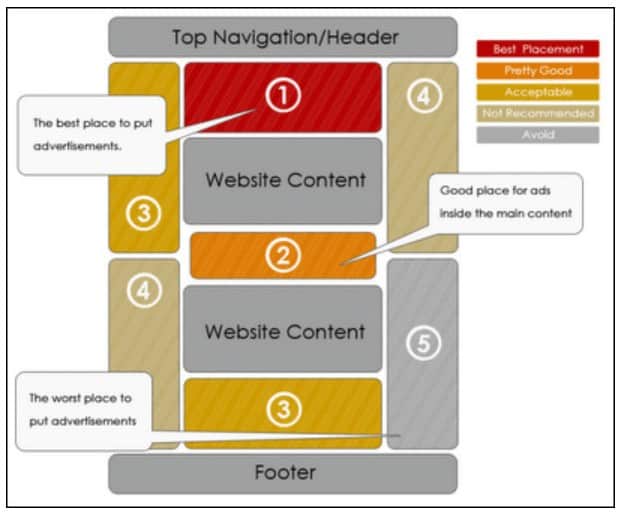
As you can see, the site header is far from the most desirable place for placing contextual ads. Why am I saying all this? Often it turns out that the site owner first puts an advertisement in the header and in addition to it even before the content itself. The second block of ads, of course, is gaining most of the clicks because it is located in a hot spot, but the CPC in this area leaves much to be desired. Why? That’s because the top block, which is in the header, takes the most expensive and relevant ads from the second one. You are losing profits. In this case, you can simply leave the block that receives the most clicks and look at the result.
2. Text and Image Ads Participate in Various Auctions
That is different formats – separate pricing. What benefits can be gleaned from here? The fact is that when I put a text block in front of the main content and put it graphically after it, the average CPC was higher than just the graphical advertisement. Hence, I assume that they participate in various auctions. It’s not for nothing that the Google people themselves say they use multiple formats of contextual advertising on the site.
3. Google AdSense Pays Webmasters 68% of the Cost Per Click
For link blocks, text and image ads and 50% to search partners who put a search box from google on their site. Even though in the second case, a higher commission is taken, the CPC “from the search” is much higher. I don’t know why, but there were also those with whom the 32% commission seemed huge. In my opinion, these are good figures.
In connection with all this, you need to remember that the most clickable block of ads should be higher in the page code. Those who are familiar with CSS can be slightly manipulated with the layout so that, for example, the block is lower in the code and higher on the page itself. This is not punishable by google AdSense. Use various ad formats on the site. With all this, you can increase the revenue from contextual advertising by spending no more than an hour on optimization. Well, of course, do not forget to experiment.